sabsmike
Guest
|
 |
« on: May 01, 2006, 04:49:49 AM »
|
 Quote Quote
|
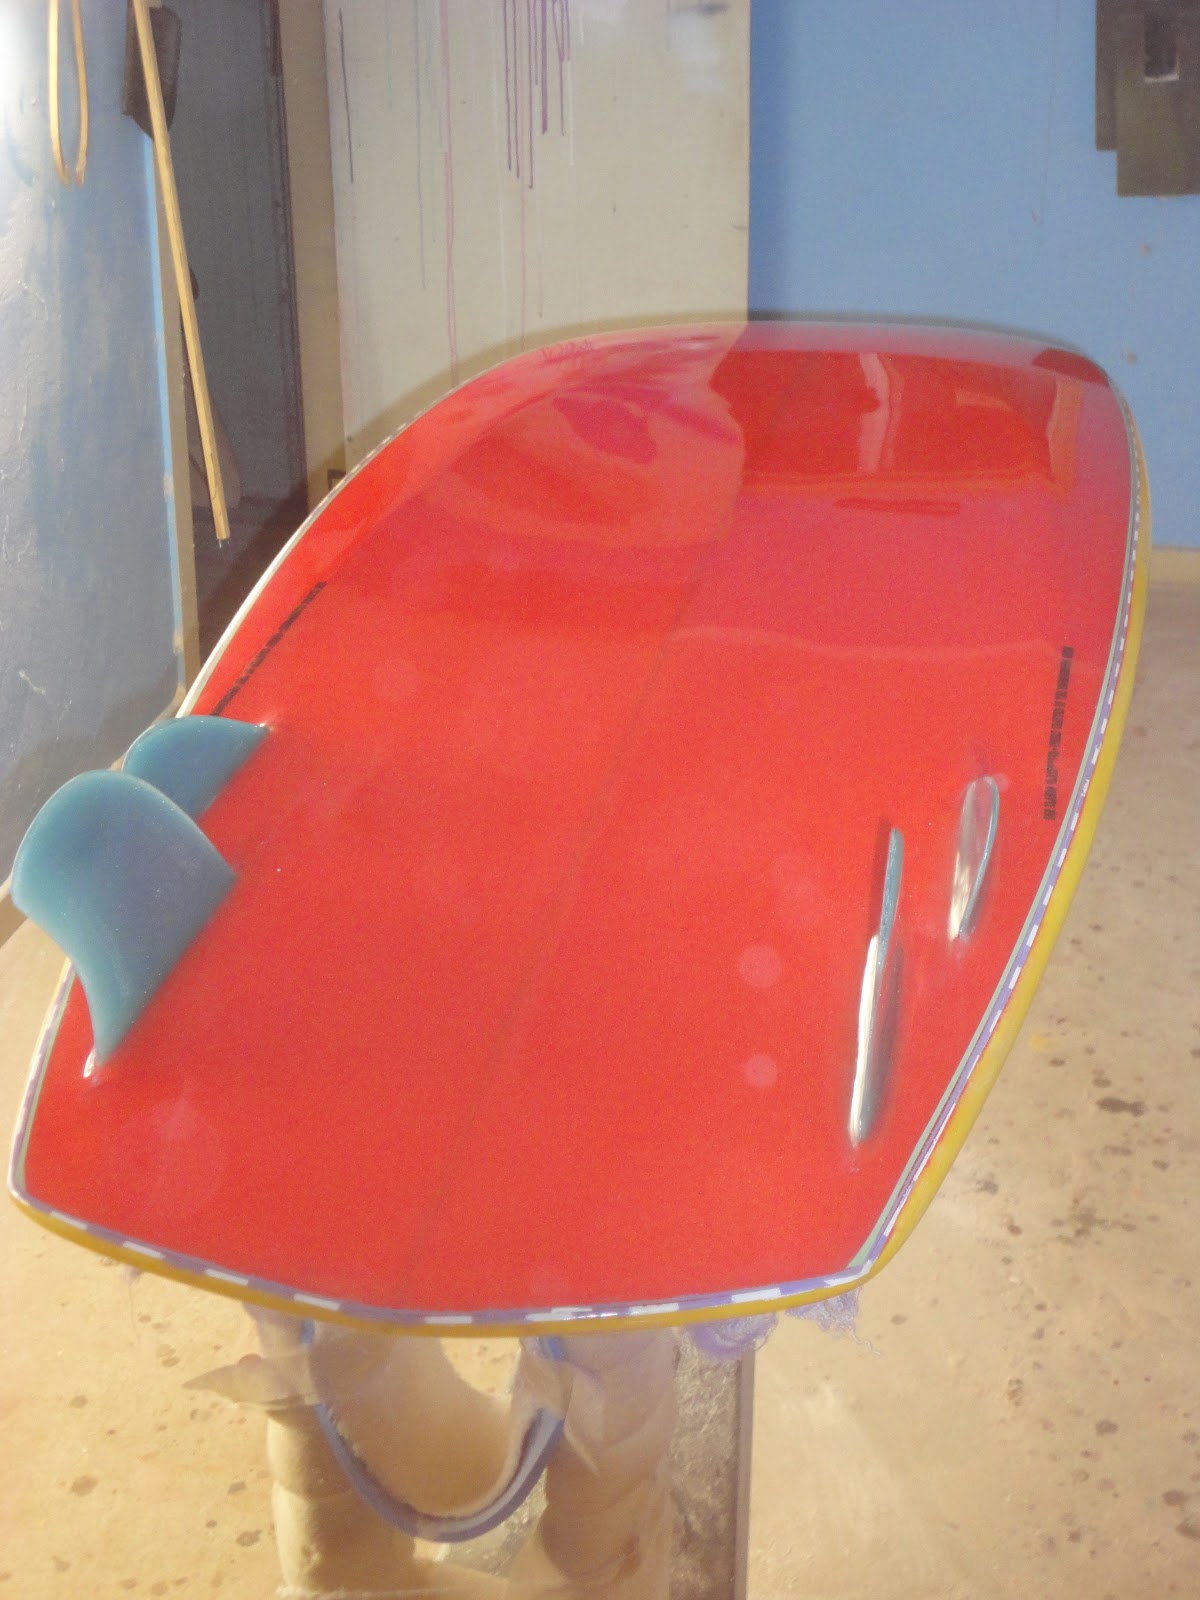
The flat board
Its getting its 2pak now
sneaked a surf on it yesterday in small waist high
goes good real good
im 82 kgs and its only 6'1" x 18 3/16" x 2 1/16 "
its easy to paddle and has good speed and its nice and loose
mike
will post pis of it all shinny tomorrow
|
|
|
|
|
sabsmike
Guest
|
|
« Reply #1 on: May 01, 2006, 04:51:37 AM »
|
Quote
|
Guess i had better add one pic of what it looks like when it not flat
Mike
|
|
|
|
|
paul cannon
|
|
« Reply #2 on: May 01, 2006, 06:03:40 AM »
|
Quote
|
hey sabs
thats great
i remember sending a pm to bert about doing boards flat.
i never understood why the home depo guys didnt press in the rocker
would have saved on a foam sheet.
it seemed to me to be the the most simple way to cut and shape a board.
i had a look at a few overhead cnc signcutting machines on the net.
(starting from 10k)way beyond me
as a way to faithfully reproduce cnc boards in one hit without hotwires
ready for the skins.
the foam sheet would be held down with vacuum table
and cnc router cuts outline
rails glued on then placed back on locators and the dome shaped.
glad to see someone having a crack at it
|
|
|
|
|
Steve Franklin
|
|
« Reply #3 on: May 01, 2006, 07:31:22 AM »
|
Quote
|
Very elegant Mike. What's your rocker bed made of? it looks like concrete
|
|
|
|
|
Benny
|
|
« Reply #4 on: May 01, 2006, 11:59:38 AM »
|
Quote
|
I wire mine out flat too. Flat deck, anyway. Bottom rocker starts as thickness coming out.
Bagging
on skins is when to introduce rocker. Works fine & doesn't snap
back at all. Works whether I'm doing just the bottom skin first, or
doing both at once.
|
Don't taze me, bro.
|
|
|
sabsmike
Guest
|
|
« Reply #5 on: May 01, 2006, 03:45:39 PM »
|
Quote
|
Hi
The rocker bed is just a block of eps
finished weight smack on 2 kgs
Mike
|
|
|
|
|
paul cannon
|
|
« Reply #6 on: May 01, 2006, 08:56:56 PM »
|
Quote
|
lovely
if you dont mind me asking
whats that foam insert for the fcs plug ?
and does it isolate the core iff a plug pulls out
|
|
|
|
|
Jarrod
|
|
« Reply #7 on: May 02, 2006, 12:23:07 AM »
|
Quote
|
Great idea, can't believe it's never been
mentioned before. Great way to make the eps supply stretch farther too.
I always hated all the cutoff waste on a big block of eps when cutting
rockers.
|
"He played it safe" can be very easily sandblasted into a slick slab of granite.
|
|
|
paul cannon
|
|
« Reply #8 on: May 02, 2006, 02:17:02 AM »
|
Quote
|
shh its a secret

i think the concept has been dropped a few times
by meecrafty
makes it easier to glue on the rails as well |
|
|
|
|
dougirwin13
|
|
« Reply #9 on: May 02, 2006, 02:57:03 AM »
|
Quote
|
Funny... Never heard of it, but it's how I am doing it 
-doug |
|
|
|
sabsmike
Guest
|
|
« Reply #10 on: May 02, 2006, 04:22:42 AM »
|
Quote
|
HI Guys
The green stuff is much denser foam so yes it does isolate the eps in the event of a fin or leash plug failure
I just cut the square out of the eps and slide the green foam in no glue or any thing the inner lams hold it all in place
the big advantage with the flat board is the rail balsa is a single piece of 12mm wide balsa with only one join in the middle
Its cut straight stuck on with 5 min then the deck eps is shaped down to it
so when its bagged the rails are pre stressed kinda like a bow
After the single bagging session just shape the rails and then glass the rails
This one only has a single layer of 3 oz
It means that the straight line for the next board is allready cut on the eps block
Oh nearly forgot the green foam is about 80 density pvc its comes as a cover sheets for foam we get at work
Its got cardboard stuck on on side so thats the edge after its been poured
If you ask around your local boatbuilder etc you should be able to get bits just the right size for free
mike
|
|
|
|
|
Benny
|
|
« Reply #11 on: May 02, 2006, 11:30:40 AM »
|
Quote
|
Brilliant about the rails, Mike. They bend
that easy, or do you have to overdo the rocker in the bag, to allow for
springback once it comes out?
I've done finboxes a few different
ways too. Some, like yours, (although I glued in the HD PVC with
foaming PU glue. Others, I glued a PVC halo around the box first, then
routed out a larger hole for the whole works, before putting skins on.
Leave the finbox proud of the foam to account for skins. That took
extra work, but the box actually helped keep the bottom skin lined up
while going into the bag and I'm sure its the strongest, most leak-free
way to 'cap' a box...
Ben
|
Don't taze me, bro.
|
|
|
mark venn
|
|
« Reply #12 on: May 02, 2006, 03:21:21 PM »
|
Quote
|
Hi Mike
That looks like a very stylish and simple approach, although planning would make or break it I am sure.
With
the tooing and froing between forums, I seem to have missed the whole
process, am I right to believe that it goes like this:
Cut outline into flat foam (thickness foiled?)
stick on rails, 2 x 12mm peices either side
shape roll into deck
vac deck and bottom incl inside and outside glass
glass rails
finish?
Do you overlap the rails with the top and bottom skins?
Sorry if this is ground already covered, but I have been away for a few days and trying to catch up
Cheers
Mark
|
|
|
|
|
Dan_Barger
Guest
|
|
« Reply #13 on: May 02, 2006, 03:28:53 PM »
|
Quote
|
This is just a thought, but if wood breaks at a
certain point and you pre-stress it by bending it half its breaking
distance and locking it in place - wouldn't you increase the likelyhood
of the board breaking? I guess only time will tell.
|
|
|
|
|
sabsmike
Guest
|
|
|
« Reply #15 on: May 02, 2006, 04:47:55 PM »
|
Quote
|
Thanks Mike
A very comprehensive reply!
A
couple more questions though, I have just skinned a board with
prefabbed skins, the rails on the deck side were really hard to shape
and not leave a hard edge at the edge of the glass line, have you found
this a problem?
Using 12 mm rails (as I did on this board), limits
the amount of tuck available, so rails tend toward a hard type any
problems here?
You have mentioned in the past using everdure as a pre treatment, is this a trade name or product name?
I
have been using SP Systems 'Eposeal' on the decks, but carefully as it
loves to eat eps! hence my interest in prefabbing skins as I can
pretreat off the blank.
I had a problem with the glass on the bottom
of the latest board, and ended up stripping the glass off (surprisingly
easy) and doing a hand lam on the bottom and incorperating the rails,
turned out very nicely as it happens.
As we have no RR in the UK as
yet (and no additive F), I have been mixing up my filler coat with some
SP pregel, which increases the viscosity of the resin and allows it to
be squeegeed into any pinholes, much better than neat resin, and its
pretty clear.
Mark
|
|
|
|
|
Dan_Barger
Guest
|
|
« Reply #16 on: May 02, 2006, 05:41:01 PM »
|
Quote
|
the rails on the deck side were really hard to shape and not leave a hard edge at the edge of the glass line,
The
key for me was in properly preshaping the rails. The first time I did
it they turned out awful, but the second time I pretty closely followed
Bill Barnfield's shaping guide and life went better.
|
|
|
|
|
paul cannon
|
|
« Reply #17 on: May 02, 2006, 08:56:37 PM »
|
Quote
|
yeah bills post was a gem for sure
marky i leave a flat on the rails and
at
the ends of the board no dome at all cause its reallyt hard to wrap
the skin at the nose and tail because of grain orientation
then i cap off the rails with another layer of 3mm balsa to shape the rail apex.
obviously the bottom of the boards rail band is cut after the skin is on
thanks for the tip mike
dont know if i can access to pvc with out buying a whole sheet
might try xps
whaddaya think?
|
|
|
|
|
Benny
|
|
« Reply #18 on: May 03, 2006, 12:46:24 AM »
|
Quote
|
I've talked to Bernie about XPS rails before.
What we came up with was to use it but make sure to attach them with
something more porous than epoxy. Either beads of 5 min. or foaming PU.
That way, if the XPS was to outgas, the path of least resistance for
the gas would be through the adhesive and into the EPS which can
probably handle the small amount that rails alone could produce. Given
the choice of going through foamed PU glue into lightweight EPS, or to
the outside world through layers of glass & hardened resin, we were
quite sure the board would choose not to delam...
|
Don't taze me, bro.
|
|
|
paul cannon
|
|
« Reply #19 on: May 03, 2006, 04:12:37 AM »
|
Quote
|
hi benny
i really meant to say use xps in the fin box area
hadnt thought of using in the rail
|
|
|
|
|
sabsmike
Guest
|
|
« Reply #20 on: May 03, 2006, 03:58:26 PM »
|
Quote
|
Mark
yep its a tiny feather edge i just use
a flat sanding board with 120 grit paper i try to get a feather edge
that is about 6mm wide
the other way is when you have done a couple and know better where the feather edge ends up
is to pre cut a resess down in the skin
this means that the pre glass top skin edge will be about 1mm lower then the rest - do this before pre glassing
now when the rail lap glass goes on it fills this resess giving a flush finish
it sounds hard but once you get better at pre planing what you want to end up with it gets easier
Mike
|
|
|
|
|
mark venn
|
|
« Reply #21 on: May 03, 2006, 05:25:36 PM »
|
Quote
|
Mike
Top tip straight from the boatbuilding world!!
Pre
planning is a problem as I as yet haven't done many boards to the same
template, but as I have been using 3mm decks, there is a little room for
a rebate.
Can i be so bold as to ask you again about the everdure?
|
|
|
|
|
sabsmike
Guest
|
|
« Reply #22 on: May 03, 2006, 08:33:35 PM »
|
Quote
|
Sorry Mark
everdure it a trade name
The product is made by international paints
they describe it as a clear two part epoxy based sealer
it not very clear it rather yellow really
it is quite runny and thin though
im
investigating some other presealing ideas at the moment as due to its
cell makup surface treatments do not penertrate very far with balsa
mike
|
|
|
|
|
Steve Franklin
|
|
« Reply #23 on: May 03, 2006, 09:59:57 PM »
|
Quote
|
If penetration is a problem - how about going
thinner with your skins? say 1.5 mm and treating both sides. With 1.5 mm
balsa you can increase your glass schedule to regain stiffness without
too much extra weight. My egg uses 1.5 mm balsa with 3.5 under and 9
over on the deck. And I think Dan uses 1.5 as well.
Alternatively
if you are pre-laminating skins you can heat up the resin so it's
runnier and use more vacuum say 25" hg to suck it through the balsa.
|
|
|
|
|
Dan_Barger
Guest
|
|
« Reply #24 on: May 03, 2006, 10:35:59 PM »
|
Quote
|
So far epoxy penitration hasn't been a problem.
I would guess my skins are around 2mm and on my deck I'm running 2
under and 4 over with zero sign of wear. As soon as I return to board
building (which is pretty soon) I'm going to start experimenting with
some crazy stuff.
|
|
|
|
|
sabsmike
Guest
|
|
« Reply #25 on: May 04, 2006, 03:49:09 AM »
|
Quote
|
The only time ive had a problem is when ive holed a board
then repaired it but have not fully dried the eps
so the water progression into the balsa has come internally
I dont really want to suck resin into the balsa as it then gains weight
the only time i want resin to saturate the balsa is when i want the core to be stronger vertical compression wize
as for rail shaping
i do all the rough shaping with a router
that way its exactly the same on e
|
|
|
|
|
« Reply #14 on: May 02, 2006, 04:09:44 PM »
|
Quote
|
Hi Mark and Ben
Ben it would have to bend
quite a lot more to reach break point plus with the skins attached to
the to the top and bottom of the rails ,the rails are effectivly a
sandwich core
Mark
a quick outline
two sets of templates needed
one is the center longitudinal of the board with the bottom flattened out and the deck foil shape on the top
two is rail in 12mm from the board edge once again bottom flattened
hot wire the top and bottom using template one
cut the plan shape out 12mm smaller then finished size
using
template two cut rails out of solid balsa 12mm thick only one join in
the middle (see other posts about getting raw balsa and cutting your
self)
stick rails to eps with 5 min epoxy and masking tape to hold them in place
make balsa nose and tail blocks and attach to eps
shape deck roll down to balsa rails ,use the inboard edge as the limit guide
true up plan shape to the finished plan shape
cut out fin and leash areas and replace eps with harder foam
tape balsa planks together turn over and pre glass outer side deck and bottom
Trim both so they just over blank by 1/8"
glass inside of both skins (place a small section of extra glass where fin mounts go)
put it all together use masking tape front and back to keep the bit aligned together
Have a eps block pre hotwired with you desired rocker
put the board on the block and put it all in the vac bag
if
you want concaves etc use a sheet of 3mm mdf bog to create a female
version of the desired concaves -then put this mdf shape between the
board and the eps rocker block when you bag
once you have debaged shape the rails this will leave a feather edge in the preglassed skins for you to lap the rail glass over
thats it - shorter boards rail shape and skin thickness and glass schedule tend to have most effect on stiffness
Longer boards start to need springers top hats etc to assist with flex control
i hope thats not too long winded for you
really the bottom line i think is keep it simple and do not over engineer it
the
sandwich is a amazingly strong thing which is why if you look at things
from sheets of cardboard to huge boats it is used every where
The
down side with balsa is water it must be were tight extenally but if
you get a ding or hole in the board unless you can dry the inside fully
the balsa will eventually rot from inside
I havnt gone into it here but there are several ways to pre treat the balsa
the very cell structure of balsa makes this very difficult to do with any great success
Mike
|
|
|
|
|


 twinzer stump


 CIMG0296.JPG


